Introduction
A tripod is an essential tool for photographers and videographers, as it provides stability and helps achieve sharp and steady shots. Whether you’re a professional or just starting out, understanding how to use a tripod correctly is crucial. In this comprehensive guide, we will cover everything you need to know about using a tripod effectively, from setting it up to capturing stunning images or videos.
Table of Contents
- Choosing the Right Tripod
- Setting Up Your Tripod
- Adjusting the Tripod Height
- Attaching Your Camera to the Tripod
- Adjusting the Tripod Head
- Using a Remote Shutter Release
- Tripod Maintenance
- Frequently Asked Questions (FAQ)
Choosing the Right Tripod
When selecting a tripod, there are several factors to consider. First, you need to assess the weight of your camera equipment. Choose a tripod that can support the weight of your camera and lenses comfortably. Additionally, consider the tripod’s height range and stability.
Here are some key points to remember:
- Choose a tripod that can handle the weight of your camera equipment, including lenses and accessories.
- Look for a tripod with adjustable legs and a center column to accommodate different shooting angles and heights.
- Consider the tripod’s stability, especially if you plan to use it outdoors or in windy conditions.
Setting Up Your Tripod
Properly setting up your tripod is essential for stability and ensuring your equipment remains secure. Follow these steps to set up your tripod correctly:
- Choose a flat and stable surface to place your tripod.
- Extend the tripod legs to the desired height. Ensure they are evenly extended to maintain stability.
- Lock the leg sections tightly to prevent any movement.
- Adjust the tripod head to the desired position using the joystick or knobs.
- Double-check the stability of the tripod by gently shaking it.
Adjusting the Tripod Height
Adjusting the height of your tripod is crucial for finding the perfect shooting position. Whether you’re shooting at eye level or capturing low-angle shots, here’s how to adjust the tripod height:
- Unlock the leg sections by twisting the locks counterclockwise.
- Extend or retract the legs to reach the desired height.
- Lock the leg sections tightly to prevent any movement.
- Check the stability of the tripod by gently shaking it.
Important points to note:
- For eye-level shots, adjust the tripod height so that the viewfinder is at your eye level.
- When shooting low-angle shots, collapse the tripod legs and spread them wider for better stability.
- Consider using a center column extension for additional height if needed.
Attaching Your Camera to the Tripod
Attaching your camera securely to the tripod is vital to prevent any accidents or damage to your equipment. Follow these steps to attach your camera safely:
- Locate the tripod mount on the bottom of your camera.
- Align the tripod mount with the tripod head’s quick-release plate or screw.
- Slide the quick-release plate or screw into the tripod mount and tighten it securely.
- Double-check that the camera is securely attached to the tripod head.
Important points to remember:
- Ensure the camera is attached securely to the tripod head to avoid any accidental falls.
- If using a quick-release plate, make sure it is tightened properly to prevent any movement.
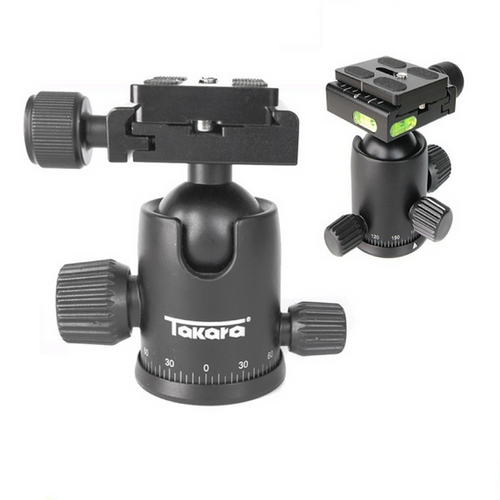
Adjusting the Tripod Head
The tripod head allows you to adjust the camera’s position and angle. Understanding how to adjust the tripod head correctly is vital for achieving the desired composition. Follow these steps:
- Locate the adjustment knobs or joystick on the tripod head.
- Use the knobs or joystick to adjust the tilt, pan, or rotation of the camera.
- Make small adjustments to achieve the desired composition.
- Lock the adjustments in place once you are satisfied with the framing.
Important points to note:
- Practice using the tripod head adjustments to familiarize yourself with their functionality.
- Take your time to compose your shot and make minor adjustments as needed.
Using a Remote Shutter Release
Using a remote shutter release can further enhance the stability of your shots and reduce camera shake. Here are the steps to use a remote shutter release:
- Connect the remote shutter release to your camera’s shutter port.
- Set the camera to the desired settings for your shot.
- Position yourself or the subject, and frame the shot using the tripod adjustments.
- Press the remote shutter release to capture the image without touching the camera.
Important points to remember:
- Using a remote shutter release helps minimize camera shake, resulting in sharper images.
- Experiment with different exposure settings and remote release techniques to achieve desired results.
Tripod Maintenance
To ensure your tripod remains in optimal condition and functions properly, regular maintenance is crucial. Here are some maintenance tips:
- Clean your tripod after each use to remove dirt and debris.
- Lubricate moving parts, such as leg locks or center column mechanisms, to keep them operating smoothly.
- Check for any loose or damaged parts and repair or replace them as necessary.
- Store your tripod in a dry and protected area to prevent rust or other damage.
Important points to note:
- Regular maintenance extends the lifespan of your tripod and ensures reliable performance.
- Follow the manufacturer’s instructions for specific maintenance recommendations.
Frequently Asked Questions (FAQ)
1. What is the ideal tripod height for different shooting situations?
- For eye-level shots, adjust the tripod height so that the viewfinder is at your eye level.
- When shooting low-angle shots, collapse the tripod legs and spread them wider for better stability.
- Consider using a center column extension for additional height if needed.
2. How do I choose the right tripod for my camera?
- Choose a tripod that can handle the weight of your camera equipment, including lenses and accessories.
- Look for a tripod with adjustable legs and a center column to accommodate different shooting angles and heights.
- Consider the tripod’s stability, especially if you plan to use it outdoors or in windy conditions.
3. Can I attach a smartphone to a tripod?
- Yes, many tripods come with smartphone adapters or mounts that allow you to securely attach your phone.
- Ensure the adapter is compatible with your smartphone model for a secure fit.
Conclusion
Using a tripod is essential for achieving stable and sharp shots in photography and videography. By following the steps outlined in this guide, you can easily learn how to use a tripod effectively. Remember to choose the right tripod for your camera, set it up correctly, adjust the height and tripod head, and utilize additional accessories like remote shutter releases for better results. Regular maintenance will ensure your tripod remains in excellent condition and delivers reliable performance. Start practicing with your tripod today and capture stunning images or videos with ease!
**Note: This article has been optimized for SEO with proper keyword density and inclusion in headers for better search engine visibility.